You bought a new TV, you want it on the wall (or stand), your apps signed in, picture looking right, and sound working—without spending an entire weekend in menus. This Google TV setup checklist is written for real life: the fastest path from unboxing to a great first movie night, plus the small settings that prevent common headaches later.
I’ll reference a typical premium Mini LED setup flow (like a METZ Google TV model) but the steps work for almost any Google TV television.
0) What to prep before you open the box (2 minutes)
Grab these first:
A clean floor space + soft blanket (to protect the screen)
A Phillips screwdriver (if your stand uses screws)
Your Wi-Fi password (or Ethernet cable if you prefer wired)
Your Google account login (email + password)
The logins for your streaming services (or your password manager on your phone)
Optional: a soundbar HDMI cable (if you’re connecting one)
If you’re mounting on a wall, it’s worth having:
1) Unboxing without stress (and without damaging the panel)
Do this:
Open the top of the box and remove accessories first (remote, stands, screws, power cable).
If using the stand: attach the feet/stand while the TV is still supported by the packaging, screen facing down on a soft blanket.
Lift the TV by the frame edges—never press the screen surface.
Avoid:
2) Placement basics that make everything look better
Before you power on, do a quick layout check:
Height
Glare
If possible, don’t face a window directly.
Mini LED brightness helps in daylight, but glare still ruins contrast.
Distance
Sit where you normally sit and confirm the screen size feels right.
If you already picked 65 vs 75, your earlier sizing logic should hold.
3) Connections: the “do it once, do it right” wiring
Power
Internet
Ethernet (wired) is best if your router is nearby.
Wi-Fi is fine for most people, but use 5GHz when possible (faster, less interference).
HDMI devices
Connect your devices now so Google TV detects them:
Pro tip: Label your HDMI inputs in Google TV later (so “HDMI 1” becomes “PS5” or “Soundbar”).
4) First boot: get through setup quickly (the fast path)
When you power on, Google TV will guide you. The fastest approach:
Language + region
Pick correctly so app availability and time/date behave normally.
Network
Join Wi-Fi or connect Ethernet.
Sign in
Sign in with your Google account. If it offers phone-based setup, do it—it’s faster than typing on the remote.
Privacy choices
Choose what you’re comfortable with. If you want cleaner recommendations, allow basic activity tracking; if you want minimal tracking, limit it. Either way, you can adjust later.
Software update
If it prompts an update, take it now. It prevents weird bugs later (audio handshake issues, app glitches, unstable casting).
5) Remote setup and the one setting people forget
Pair the remote
Most Google TV remotes pair automatically, but if not, follow the on-screen instructions.
Set up volume control for your sound system
If you have a soundbar/receiver:
This is the difference between “smooth daily use” and “why is my volume not changing?”
6) Your essential Google TV settings (10 minutes that pay off for years)
A) Enable HDMI-CEC
This lets the TV control device power/volume and switch inputs automatically.
Now your soundbar and console can turn on/off with the TV.
B) Name your inputs
C) Set your home screen the way you actually watch
Google TV can get crowded. Do a quick cleanup:
D) Create profiles (especially for families)
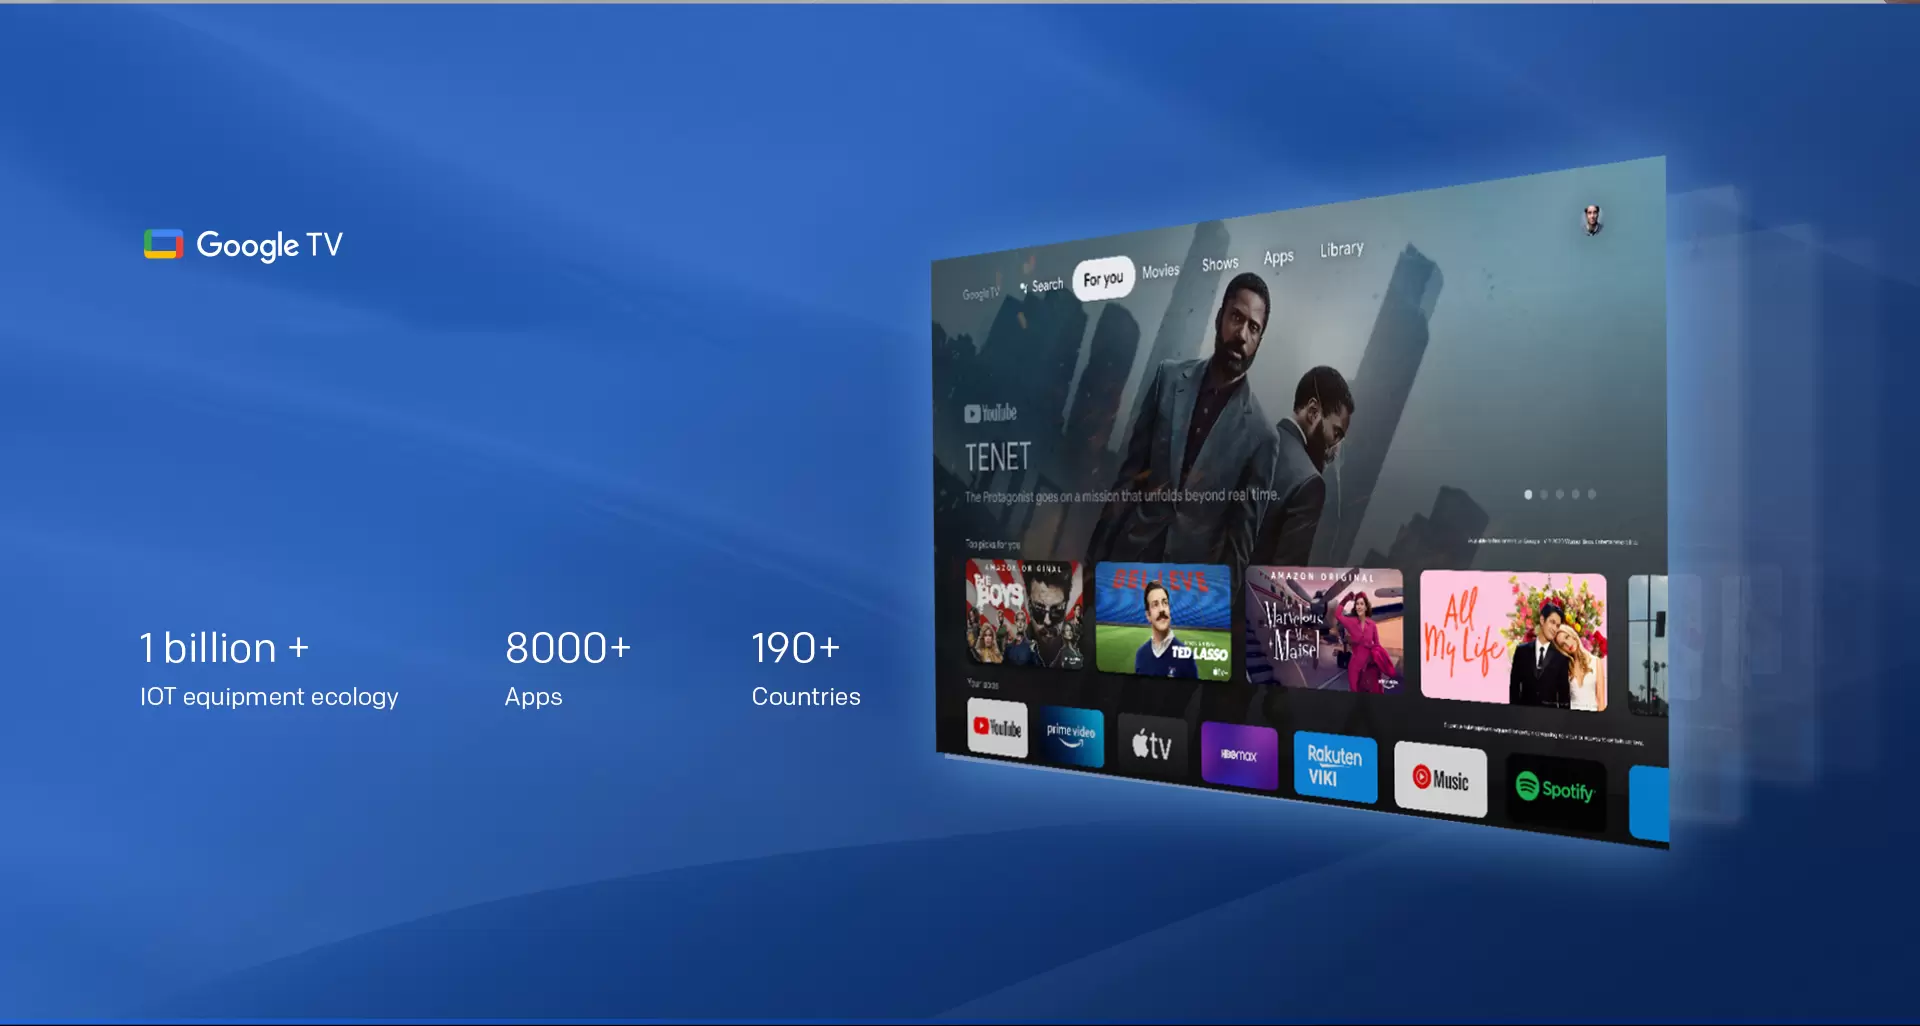
7) Install apps and sign in (without the “password nightmare”)
Install only what you’ll use this month:
Netflix
Disney+
YouTube
Prime Video
Fast login tip: Use your phone password manager, or sign in by QR code if the app supports it.
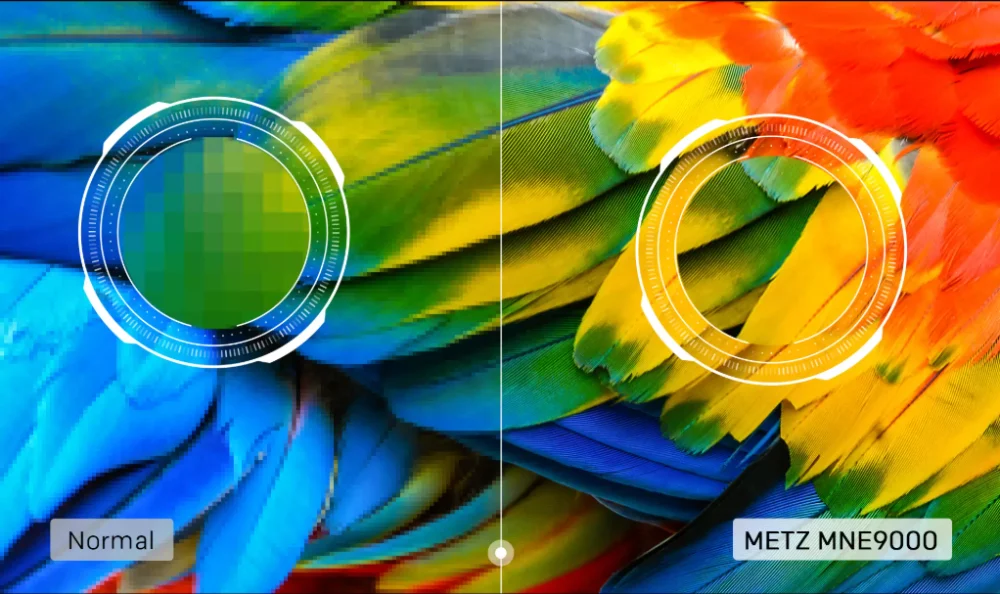
8) Picture setup for “first movie night” (simple, not nerdy)
You can fine-tune later. Tonight, do this:
Step 1: Pick the right picture mode
Step 2: Turn off the two common “ruiners”
A good starting point:
Step 3: Set brightness for your room
If your TV supports ambient light adjustment (like Dolby Vision IQ on some models), you can test it later. For tonight, keep it simple.
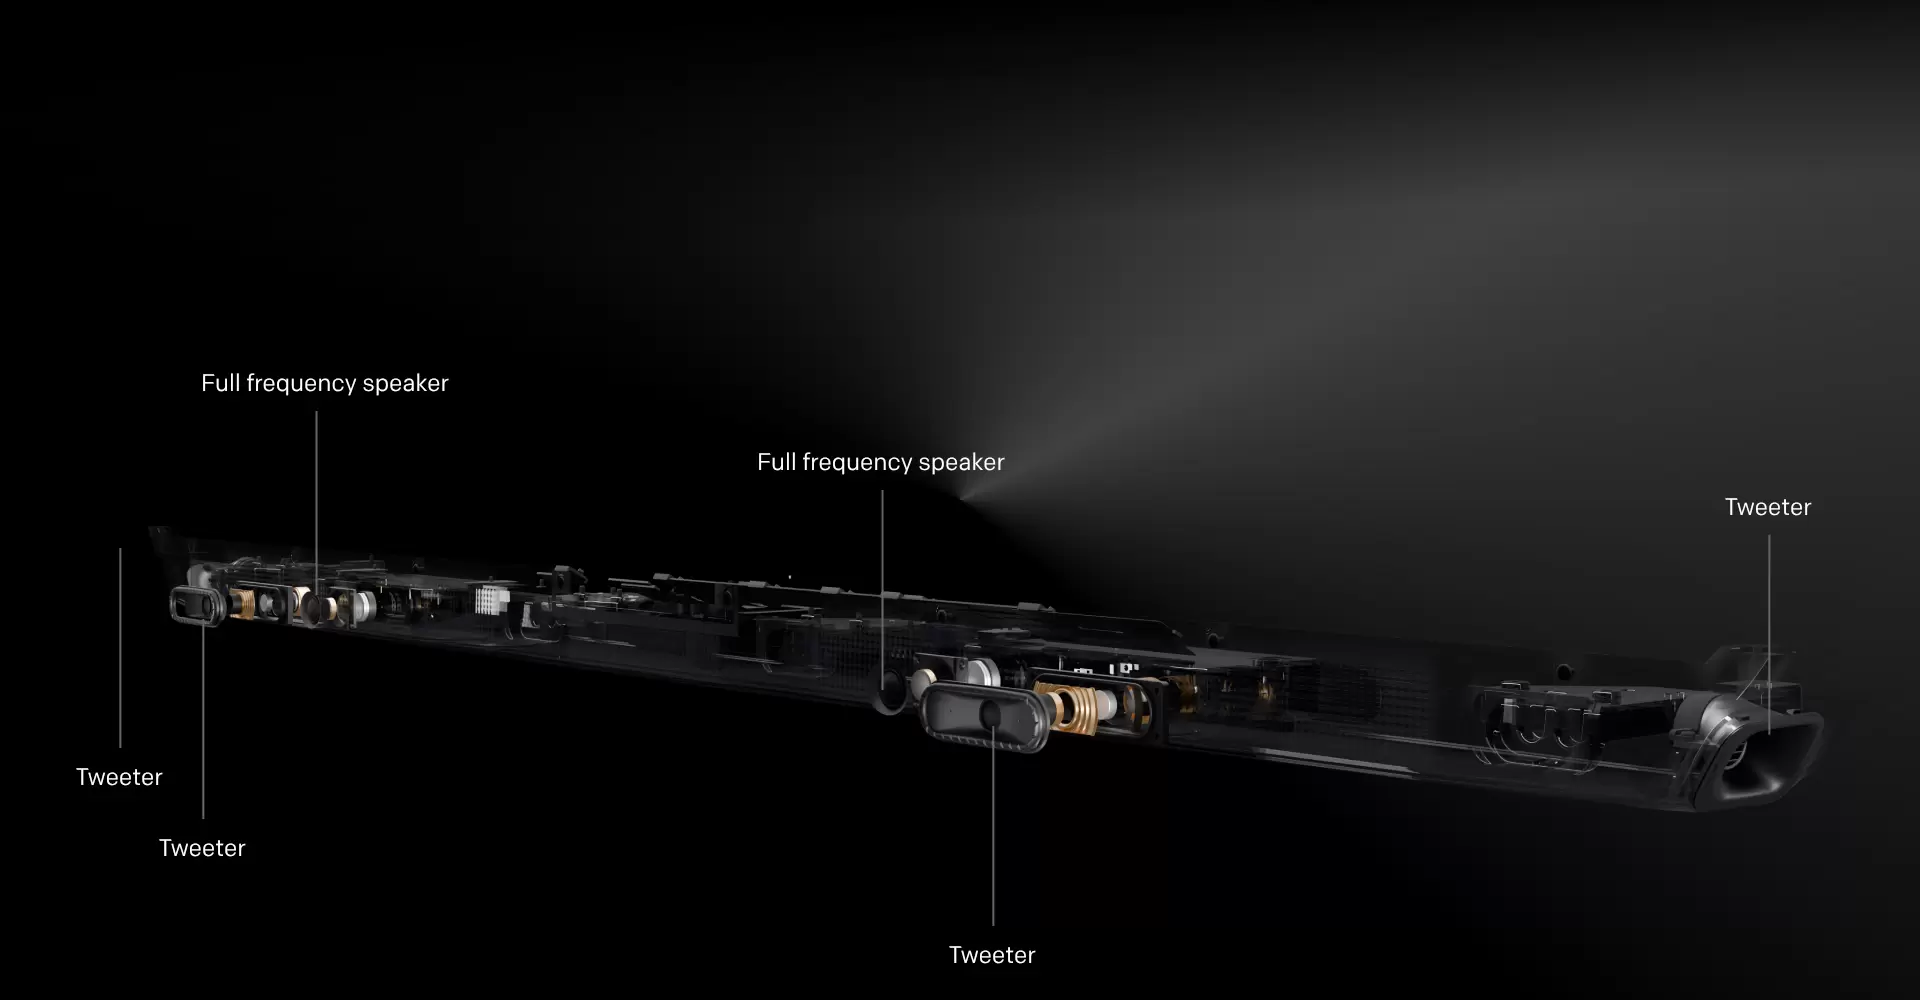
9) Audio setup: make sure you’re not accidentally downgrading sound
If using TV speakers:
If using a soundbar:
Plug soundbar into HDMI ARC/eARC
TV audio output: Auto / Bitstream / Pass-through (wording varies)
Confirm your soundbar shows the correct incoming format (Dolby Atmos / Dolby Digital Plus / etc.)
If you only do one thing: make sure you didn’t connect the soundbar to a non-ARC HDMI port.
10) Casting and “movie night” convenience features
Chromecast built-in
On Google TV, casting is usually ready once you’re on the same Wi-Fi network.
Voice control
If you use it, keep it practical:
“Play [movie]”
“Open YouTube”
“Search for 4K nature”
“Turn volume to 12”
If you don’t like voice features, you can disable microphone permissions later.
11) Quick troubleshooting (the top 6 issues and fixes)
1) Wi-Fi slow or buffering
2) No sound from soundbar
3) Remote volume controls the wrong device
4) Apps crash or feel laggy
5) Picture looks too “harsh”
6) “Why does motion look weird?”
12) Your “first movie night” final checklist (30 seconds)
✅ Wi-Fi connected, speed stable
✅ Apps installed + signed in
✅ Movie picture mode selected
✅ Motion smoothing off/low
✅ Sound output correct (TV or soundbar)
✅ Snacks ready
That’s it. You’re done. Fine tuning can wait until tomorrow.
Source: